6 Best Practices to Optimize Image Loading on Your Website
Ever uploaded a beautiful, high-resolution photo to your website’s homepage, only to watch the page grind to a halt? It looks sharp, but it takes forever to load. We’ve all been there. A potential customer gets tired of waiting and clicks away. This scenario is more than common; it’s costly, hitting your user experience, bounce rates, and even search rankings. The good news? Slow-loading images are a huge performance bottleneck, but fixing them is completely within your control.
Optimizing how your visuals load isn’t about sacrificing quality, though. It’s about a series of smart practices that get your pictures delivered quickly to every visitor, no matter their device or connection speed. By adopting these methods, you can build a faster, more engaging site that keeps people happy and helps you hit your goals. Simple as that.
Choose Modern Image Formats Like WebP and AVIF
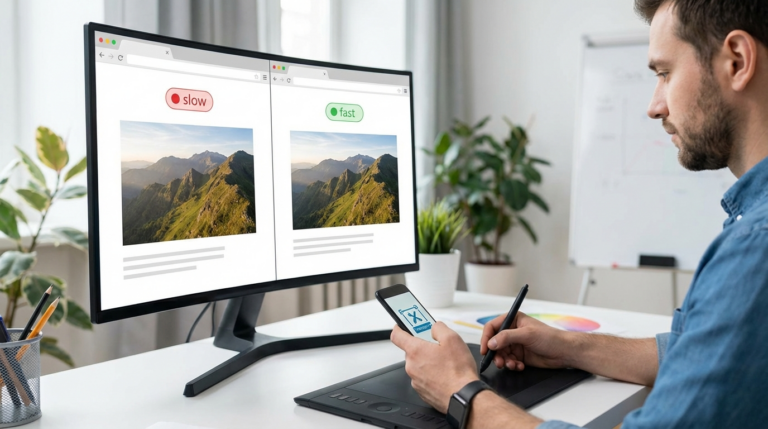
First things first: let’s talk file formats. While JPEG and PNG have been the go-to for years, newer options offer way better compression. Take WebP, for instance. It’s a format from Google that provides excellent compression for web visuals. A WebP file is, on average, 26% smaller than a comparable PNG and 25-35% smaller than a similar quality JPEG. That’s a big deal for load times.
Then there’s AVIF, which is even newer and can create files 50% smaller than JPEGs. The main hang-up used to be browser support, but you can use them safely today by providing fallbacks. It’s pretty clever, actually. Using the HTML element, you list multiple image sources. The browser then grabs the first modern format it supports (like AVIF or WebP) and only falls back to a standard JPEG or PNG if it has to. This way, everyone sees the picture, but many get a much faster experience.
Serve Responsively Sized Images for Every Screen
Have you ever thought about what happens when a giant desktop image tries to load on a tiny phone screen? Serving responsive images means sending a picture that’s actually the right size for the viewer’s screen. Sending a massive 2000-pixel-wide photo to a smartphone is a huge waste of data and slows everything down. The phone has to download that oversized file and then shrink it, which burns through bandwidth and processing power. Honestly, it’s one of the most critical parts of optimizing photos for your site.
The fix is to give the browser choices. You can provide multiple versions of the same visual at different resolutions. By using the attribute on your image tags, you create a list of image files and their widths. The browser then intelligently picks the best size based on the device’s screen resolution and pixel density. So, a desktop user gets that crisp, high-res photo while a mobile visitor gets a smaller, zippier version. It’s a win-win.
Compress Images Before Uploading
Image compression is just what it sounds like: reducing a picture’s file size, sometimes with a tiny loss in quality and sometimes without. Even after you’ve picked the right format and size, I’ll be honest, nearly every visual can benefit from one more squeeze. There are two main ways to do it:
- Lossless compression: Reduces file size without removing any image data. This is ideal for visuals with sharp lines and text, like logos or technical diagrams, where perfect clarity is essential. PNG files use this method.
- Lossy compression: Reduces file size by selectively removing some data. A high degree of lossy compression can degrade image quality, but a moderate amount often results in a massive file size reduction with little to no visible difference. JPEG and WebP are common lossy formats.
For most photographs and complex graphics on a website, a little bit of lossy compression is the way to go. Imagine you have a product photo for your online store that’s a hefty 2 MB. With a good compressor, you could shrink it to around 600 KB, making it load over three times faster, while the visual change is basically invisible to the average person. So, before you upload any images to your site, it’s a great idea to run them through an online tool like RoundCut’s image compressor. It’s a simple step that can dramatically improve your page speed.
Implement Lazy Loading for Off-Screen Images
Lazy loading is a clever trick that puts off loading images until they’re actually needed. Instead of loading every single picture on a page the moment it opens, the browser only loads the visuals currently visible on the screen. As you scroll down, other images are loaded just before they pop into view. This makes a massive difference to the initial page load time, which is a key metric for both visitors and search engines.
By loading only the essential content first, lazy loading makes the page feel much faster and more responsive to the user.
And the best part? Modern browsers make this super easy to implement. You just add the attribute to your image tags, and the browser handles the rest. It’s that simple. While you might need a JavaScript solution for older browsers, for most sites, this one little attribute is all you need to get a serious performance boost.

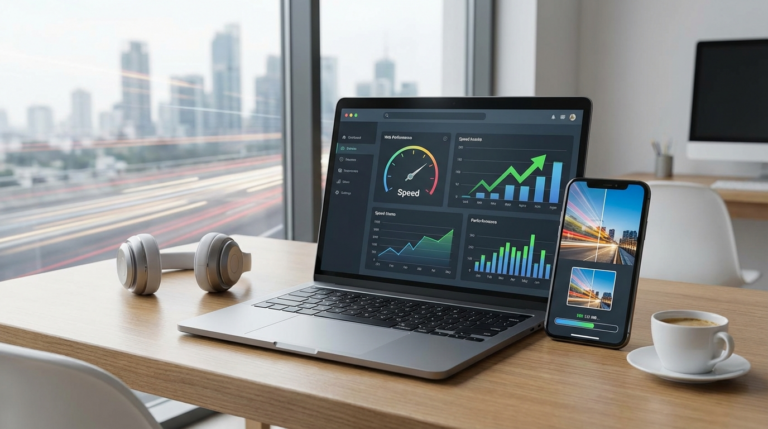
Use an Image CDN for Global Delivery and Optimization
Okay, what if your audience is spread out all over the world? That’s where an Image Content Delivery Network (CDN) comes in. Think of it as a specialized service designed to deliver your visuals quickly to people anywhere. A standard CDN already helps by storing copies of your content on servers globally, serving files from a location closer to the visitor. But an Image CDN goes a step further, providing on-the-fly image transformations.
These services can automatically detect the user’s browser, screen size, and network conditions. Based on this information, an Image CDN can:
- Convert the image to the most efficient format (e.g., serving WebP to Chrome users).
- Resize the image to the exact dimensions needed for the user’s device.
- Adjust the compression level to balance quality and file size.
Using an Image CDN can lead to file size savings of 40-80%. It’s pretty powerful. For instance, these services can take a single high-resolution master photo and automatically generate all the optimized versions needed for every visitor, which simplifies your workflow while maximizing performance.
Prioritize Image SEO Best Practices
Getting your images to load fast is only half the battle. You also need to make sure search engines can understand what they’re looking at. That’s what Image SEO is all about—helping your visuals rank in image search and boost your overall page ranking. The most basic step? Use descriptive, keyword-rich file names. Seriously, stop uploading files named IMG_8432.jpg. Instead, rename it to something like blue-suede-running-shoes.jpg. This gives search engines immediate context.
On top of that, always use descriptive alt text. The alt attribute is crucial: it provides a text alternative if a picture fails to load and is also what screen readers use for visually impaired visitors. Plus, it’s a huge signal for search engines. Your alt text should be a short and accurate description of the image. A smart approach here ensures your visuals don’t just load fast but also drive relevant traffic to your site.
So, improving your site’s image loading performance isn’t about one single magic fix. It’s the combined effect of several smart practices. From picking modern formats and compressing files to using lazy loading and a CDN, each step adds up to a faster and more pleasant experience for your visitors. My advice? Start today. Audit one key page on your site, pick a single technique—like compressing your largest images—and just see what happens to your page load speed.
FAQ
What is the best image format for a website?
For photos, WebP is usually your best bet for quality and small file size, with JPEG as a solid fallback. If you need transparency, like for a logo, stick with WebP or PNG.
Do I need a CDN for a small website?
While not strictly necessary for a small site with a local audience, an Image CDN can still offer significant benefits by automatically optimizing formats and sizes. Many services offer generous free tiers that are perfect for smaller projects.
How does image loading speed affect SEO?
Page speed is a confirmed ranking factor for Google. Since large, unoptimized images are a primary cause of slow pages, they can negatively impact your SEO rankings. Faster image loading contributes to better Core Web Vitals scores.
Can I apply these optimization techniques to profile pictures?
Absolutely. Optimizing your profile picture ensures it loads quickly and looks crisp. Before you upload it, try running it through a <a href=’https://roundcut.com.br/recortar-imagem-circulo’>circle crop tool</a> to get the perfect shape and then compress it. It’s always a good practice.
Compress images without losing quality