6 Common Clothing Photography Mistakes to Avoid for Better Sales
You’ve sourced the perfect fabric, designed a new collection, and your online store is ready. But when you upload the product photos, they fall flat. The colors look off, the fabric seems cheap, and the images fail to capture the quality of your apparel. This scenario is common for many e-commerce sellers who find that their photography, not their product, is hindering sales. Simple, avoidable mistakes can make high-quality clothing appear amateurish and untrustworthy to potential buyers.
Addressing these errors does not require an expensive studio or a professional photographer. It requires attention to detail and a clear understanding of what makes a clothing photo effective. From preparing the garment to optimizing the final image file, each step plays a direct role in how customers perceive your brand and whether they decide to click ‘add to cart’.
Mistake 1: Ignoring Garment Preparation
The single most overlooked step in apparel photography is preparing the garment itself. Wrinkles, dust, and stray threads are distracting and signal poor quality to a customer. A wrinkled t-shirt or a creased pair of pants in a photo suggests a lack of care, which customers may associate with the product itself. Before any camera is picked up, every item should be meticulously prepared.
Start by steaming or ironing each piece of clothing to ensure it is perfectly smooth. Pay close attention to collars, cuffs, and hemlines, as these areas often hold deep creases. After steaming, use a lint roller to remove any dust, hair, or loose fibers. For dark garments, especially materials like velvet or corduroy, this step is non-negotiable. These small details take only a few minutes but dramatically improve the final image, saving you significant time in post-production retouching.
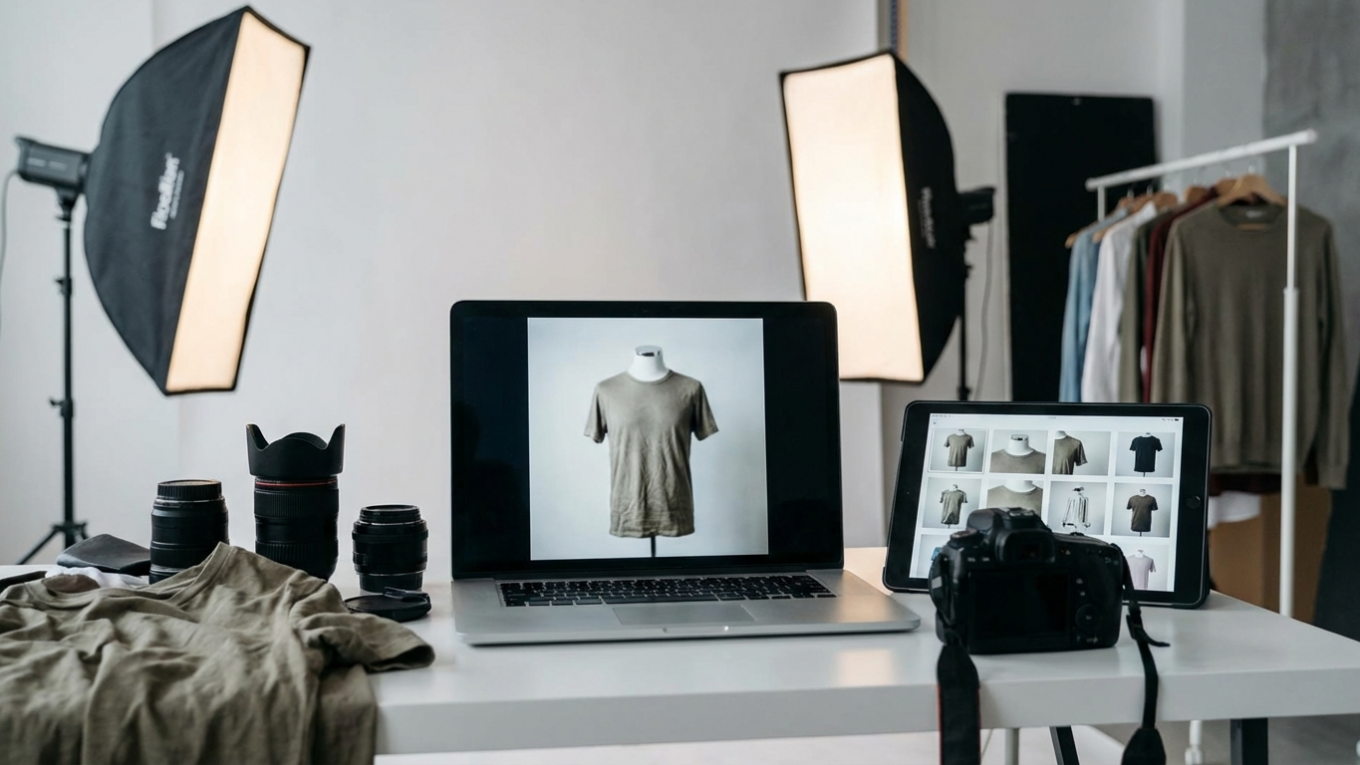
Mistake 2: Using Inconsistent and Distracting Backgrounds
Your product should always be the hero of the image. When you use cluttered, colorful, or inconsistent backgrounds, you create visual noise that competes with the clothing for attention. A potential customer browsing your Shopify store wants to see the product clearly, not your living room or a busy outdoor scene. Consistency is key for building a professional and cohesive brand aesthetic across your entire product catalog.
For most e-commerce applications, a pure white or light gray background is the industry standard. It eliminates distractions and ensures that the colors of your apparel are represented accurately. This is a strict requirement for many marketplaces, including Amazon and Mercado Libre, which mandate a pure white background for primary product images. If you’ve already taken photos against a less-than-ideal backdrop, you can use a free background remover to create a clean, uniform look for all your listings.
Mistake 3: Relying on Poor or Harsh Lighting
Lighting determines the mood, shape, and texture of your clothing in a photograph. The most common lighting mistake is using a direct, harsh light source, such as an on-camera flash or direct sunlight. This type of light creates deep, sharp shadows that can obscure important details and distort the garment’s shape. It can also create bright hot spots or glare on certain fabrics, making them look cheap.
Soft, diffused light is ideal for apparel photography because it wraps around the product evenly, minimizing harsh shadows and revealing the true texture of the fabric. You can achieve this without expensive equipment. Position your product near a large window on an overcast day for beautiful, natural soft light. Alternatively, you can create a simple studio setup with a single light source (like a lamp) and a diffuser, such as a white sheet or a purpose-built softbox. The difference is stark: a black cotton shirt shot with a direct flash will look flat with clipped details, while the same shirt shot in soft light will show its rich texture and form.
Mistake 4: Getting the Color Balance Wrong
Inaccurate color representation is one of the leading causes of product returns in online fashion retail. If a customer orders a dress that appears vibrant red on your website but arrives as a muted burgundy, they will be disappointed. This disconnect happens when the white balance on your camera is set incorrectly for your lighting conditions, causing a color cast (e.g., a yellowish or bluish tint) over the entire image.
To ensure color accuracy, avoid using your camera’s auto white balance setting, which can be unreliable. Instead, set a custom white balance using a neutral gray card. By taking a reference photo of the gray card in your lighting setup, you tell the camera exactly what ‘neutral gray’ looks like, allowing it to render all other colors correctly. After the shoot, double-check your images on multiple calibrated screens to confirm the colors are true to life.
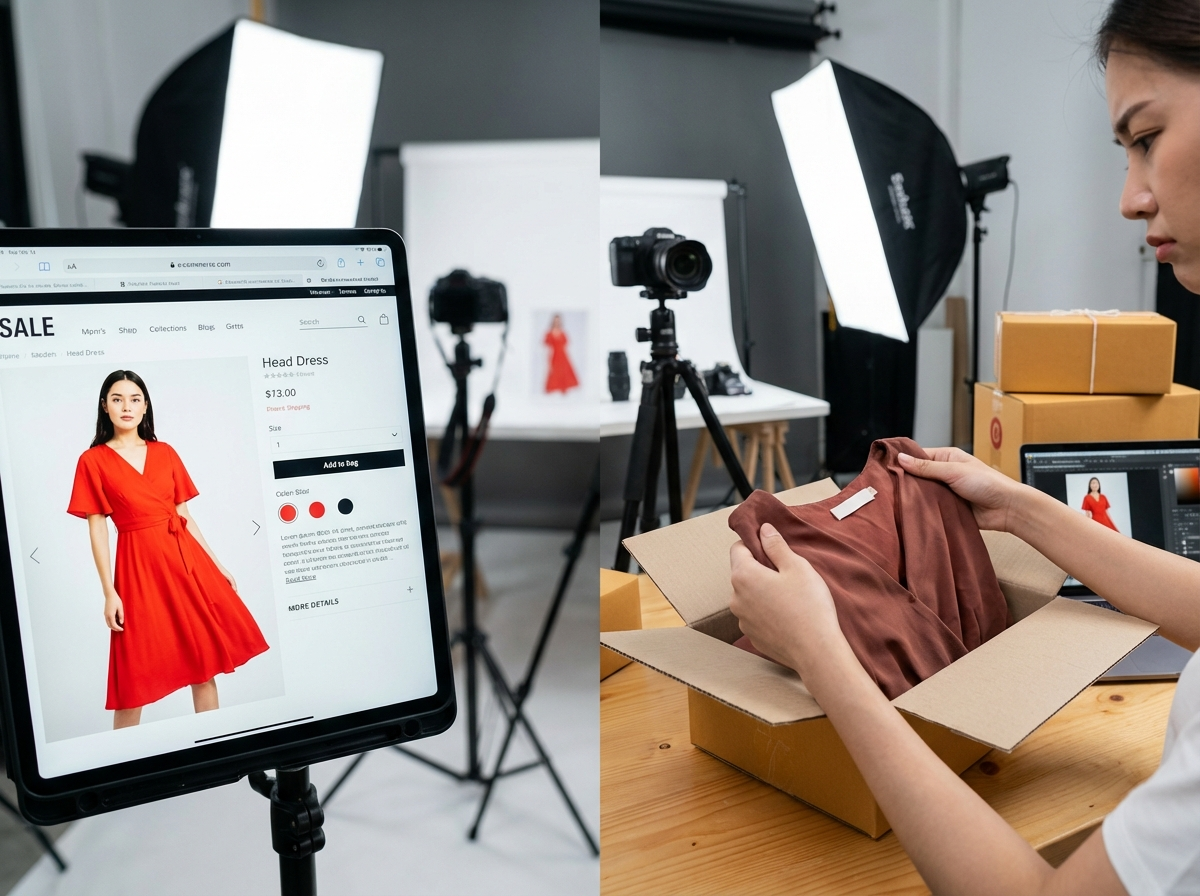
Mistake 5: Showing Only One Angle of the Product
Online shoppers cannot touch, feel, or try on your clothing. Your product photos must fill this sensory gap by providing as much visual information as possible. A single photo of the front of a garment is not enough. Customers want to see how it fits from all sides, what the back looks like, and what makes it unique. Limiting your images prevents buyers from making a confident purchasing decision.
Create a comprehensive shot list for every product that includes:
- A full shot of the front.
- A full shot of the back.
- A shot of the side profile.
- Close-up shots of important details like buttons, zippers, stitching, and fabric texture.
- An ‘in-context’ or lifestyle shot showing the item being worn (if using a model).
Providing a gallery of 5-7 high-quality images per product builds trust and helps manage customer expectations, ultimately reducing return rates.
Mistake 6: Unoptimized, Low-Resolution Images
Your product images must strike a balance between quality and performance. Photos that are too low in resolution will appear pixelated and blurry, especially when a customer uses the zoom feature. This immediately signals a lack of professionalism. On the other hand, uploading extremely large, high-resolution image files will dramatically slow down your page loading speed. A slow website frustrates users and can negatively impact your search engine rankings.
Your goal is to export images that are large enough for clear viewing and zooming (a common recommendation is 2048 pixels on the longest side) but are also compressed for the web. Before uploading to your e-commerce platform, run your final images through an online image compressor. These tools can reduce file sizes by over 70% with no visible loss in quality, ensuring your site remains fast and responsive for every visitor.
Improving your apparel photography is not about perfection on the first try; it is about incremental progress. Review your current product listings and identify which of these mistakes is most prominent. For your next photoshoot, focus on correcting just that one issue, whether it’s preparing your garments properly or setting a custom white balance. Mastering these fundamentals one by one will steadily enhance the quality of your images, build brand credibility, and drive more sales.
Remove image backgrounds for free