How to Edit Northern Lights Photos: 6-Step 2026 Expert Guide
To master how to edit northern lights photos, you should start by setting your white balance between 3200K and 4500K to preserve those natural, vibrant greens. However, the process goes far beyond a single slider. You must apply luminance masking to target the sky without muddying foreground details, and use modern AI-powered noise reduction to scrub away high ISO grain. These technical steps are what transform a flat raw capture into a professional-grade visual that actually looks like the memory you carry in your head.
Imagine standing in the freezing night for hours, tracking geomagnetic forecasts and waiting for a single break in the clouds. When the aurora finally dances across the horizon, you click the shutter with massive expectations. But then you check your camera screen, and the frame often looks flat, dark, or even sickly yellow. Still, this is a universal frustration because digital sensors simply don’t perceive low-light wavelengths the same way the human eye does. Raw files are designed to be data-rich but visually dull; they contain all the necessary information but none of the artistic soul.
The massive gap between what you saw and what the sensor recorded is exactly why post-processing is a necessity, not an option. Processing an aurora shot isn’t about faking a moment that didn’t happen, but rather about restoring the luminosity and color depth that your eyes witnessed in the dark. By following a structured aurora borealis photo editing workflow, you can clean up the digital interference from high ISO settings and bring out the intricate, vertical structures of those elusive light pillars. Plus, you’ll learn how to manage the delicate gradients of the night sky without introducing nasty artifacts or color banding.
What are the best Lightroom settings for Northern Lights?
Your camera acts as a glorified data collector, but you are the artist who defines the final vision. For low-intensity G1 or G2 geomagnetic events, your raw file might look like a faint, uninspiring green smudge. In these specific cases, you’ll want to increase the “Whites” and “Highlights” sliders to make the aurora pop against the void. But here is the trap: don’t rely on the global exposure slider. If you crank that up, you’ll brighten the entire image and wash out your deep blacks, turning the sky into a muddy gray mess. Instead, use a linear gradient to lift the sky’s exposure separately from the landscape.
When you are dealing with intense G4 or G5 solar storms, the challenge shifts entirely. These shows are so bright that they can easily blow out the highlights in the center of the light curtain, turning them into a featureless white blob with zero texture. To fix this, pull the “Highlights” slider to the left and slightly decrease the “Saturation” while bumping up “Vibrance.” This helps preserve the delicate pink and purple fringes often seen in high-activity displays without losing the structural detail of the light movement. On top of that, always check for chromatic aberration—those thin purple or blue fringes around stars—which you can easily toggle off in the Lens Corrections panel.
To understand how these adjustments change based on the storm’s raw power, use this intensity-based framework during your next arctic session in 2026:
- G1-G2 (Low Activity): Increase contrast (+15) and lift whites (+20). Use a small amount of Dehaze (+5) to cut through any atmospheric moisture or light pollution.
- G3 (Moderate Activity): Keep your exposure neutral. Focus on the “Clarity” slider (+10) to define the vertical bands and “pillars” of the light movement.
- G4-G5 (High Activity): Drop highlights (-30) and whites (-10) significantly. Use “Vibrance” instead of “Saturation” to avoid those radioactive, neon-looking greens that scream “AI-generated.”
How do I fix the white balance in aurora photos?
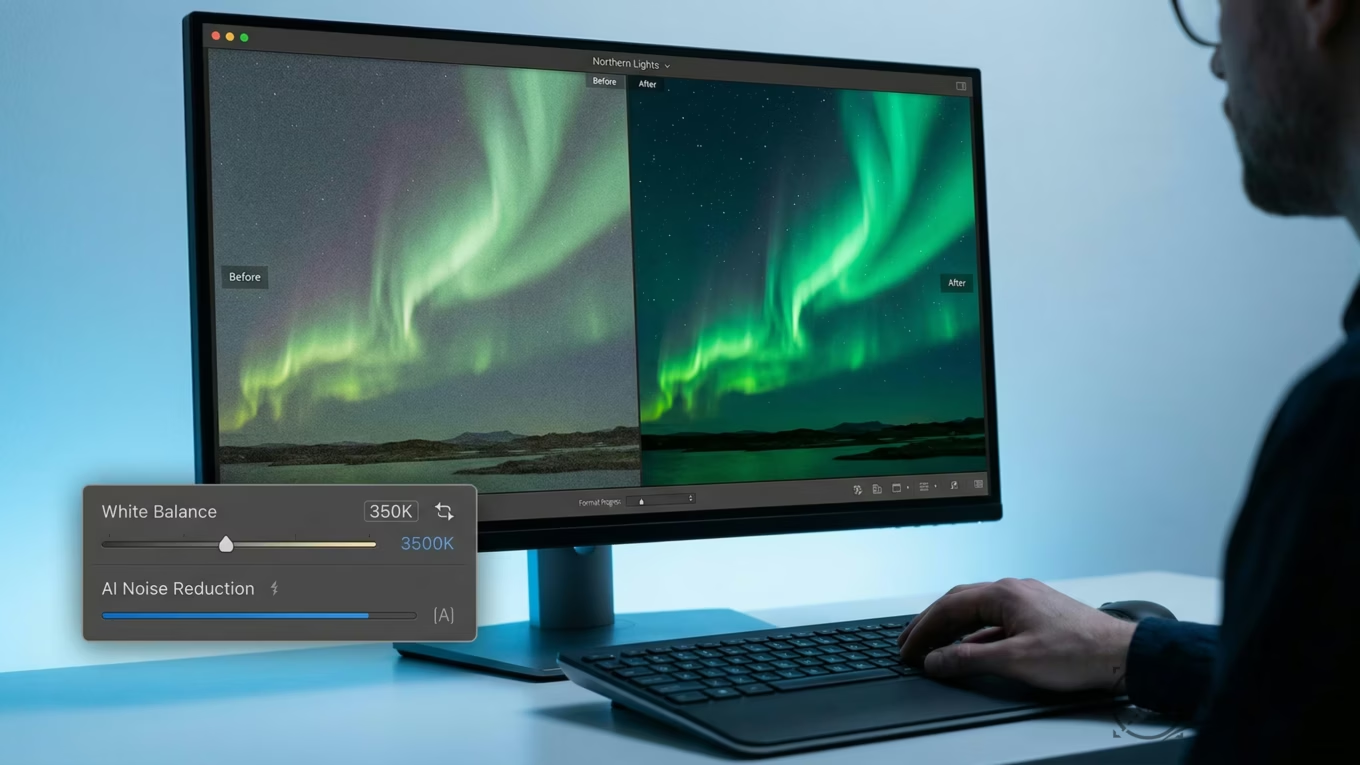
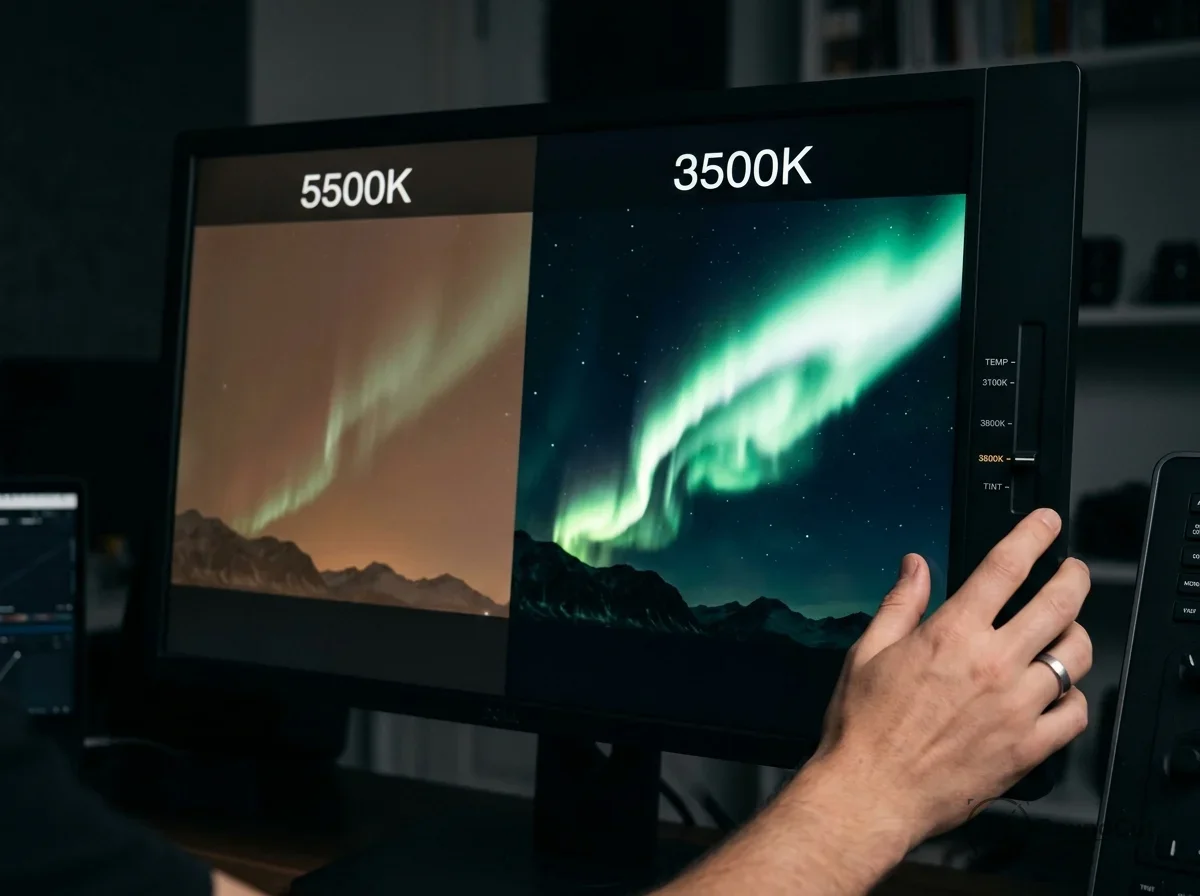
White balance is arguably the most critical setting when learning how to edit northern lights photos. Look at your “Auto” settings: most cameras will try to compensate for the overwhelming green light by adding too much magenta or yellow, resulting in a sky that looks like pea soup. You need to stay firmly in the “Cool” to “Neutral” range. Anyway, if your setting is too warm, you turn the green aurora into a sickly lime; if it’s too cold, the entire night sky becomes a deep, unnatural navy that looks fake.
The goal is to find that sweet spot where the blacks of the night sky look truly neutral and the greens look crisp and electric. This usually falls between 3200K and 4500K. Since the landscape might have different lighting (like a full moon or distant city glow), it might require a slightly warmer setting than the sky itself. In 2026, many pros use “Local White Balance” adjustments by masking the sky and the foreground separately to achieve a balanced, realistic look. For those interested in the technical side of color accuracy, you can find more details in the W3C sRGB color standards documentation.
| Aurora Intensity | Recommended Kelvin Range | Tint Adjustment | Best For |
|---|---|---|---|
| G1 – Faint Band | 3800K – 4200K | +5 to +10 (Magenta) | Natural dark skies |
| G3 – Active Show | 3500K – 3900K | Neutral (0) | Crisp green pillars |
| G5 – Extreme Storm | 3200K – 3500K | -5 (Green) | Deep reds and purples |
Managing Noise and Detail with 2026 AI Tools
Because aurora photography demands high ISO settings—often ranging from ISO 3200 to 6400—digital noise is an inevitable part of the process. In the past, noise reduction meant smearing the pixels until the shot looked like a blurry watercolor painting. Yet, with the latest 2026 AI-driven denoise engines, you can remove grain while keeping the stars pin-sharp and the aurora’s texture intact. These algorithms analyze the noise pattern and reconstruct missing details, ensuring your night sky remains professional and clear without that plastic look.
Understand that there are two types of noise in your raw captures. Color noise (random purple and green specks) is easy to scrub with a simple slider. Meanwhile, luminance noise (the grainy, sand-like texture) is much tougher to manage without losing sharpness. Use the AI Denoise feature at a strength of about 30-40%. Anything higher might make the aurora look too smooth, losing the characteristic “curtain” texture that makes it feel authentic. If you’re looking for the best app to edit northern lights photos with these AI capabilities, modern desktop software still outperforms mobile versions for heavy raw processing.
After you clean up the noise, you might notice the image looks slightly soft. Apply a small amount of “Sharpening” with a high “Masking” value. By holding the Alt key (Windows) or Option key (Mac) while moving the masking slider, you can see exactly where the effect is being applied. This ensures you are only sharpening the stars and the edges of the aurora, rather than re-introducing grain into the flat, dark areas of the sky.
“Digital sensors do not perceive light with the same logarithmic sensitivity as the human eye, requiring post-processing to align raw data with human visual perception. — International Commission on Illumination (CIE)”
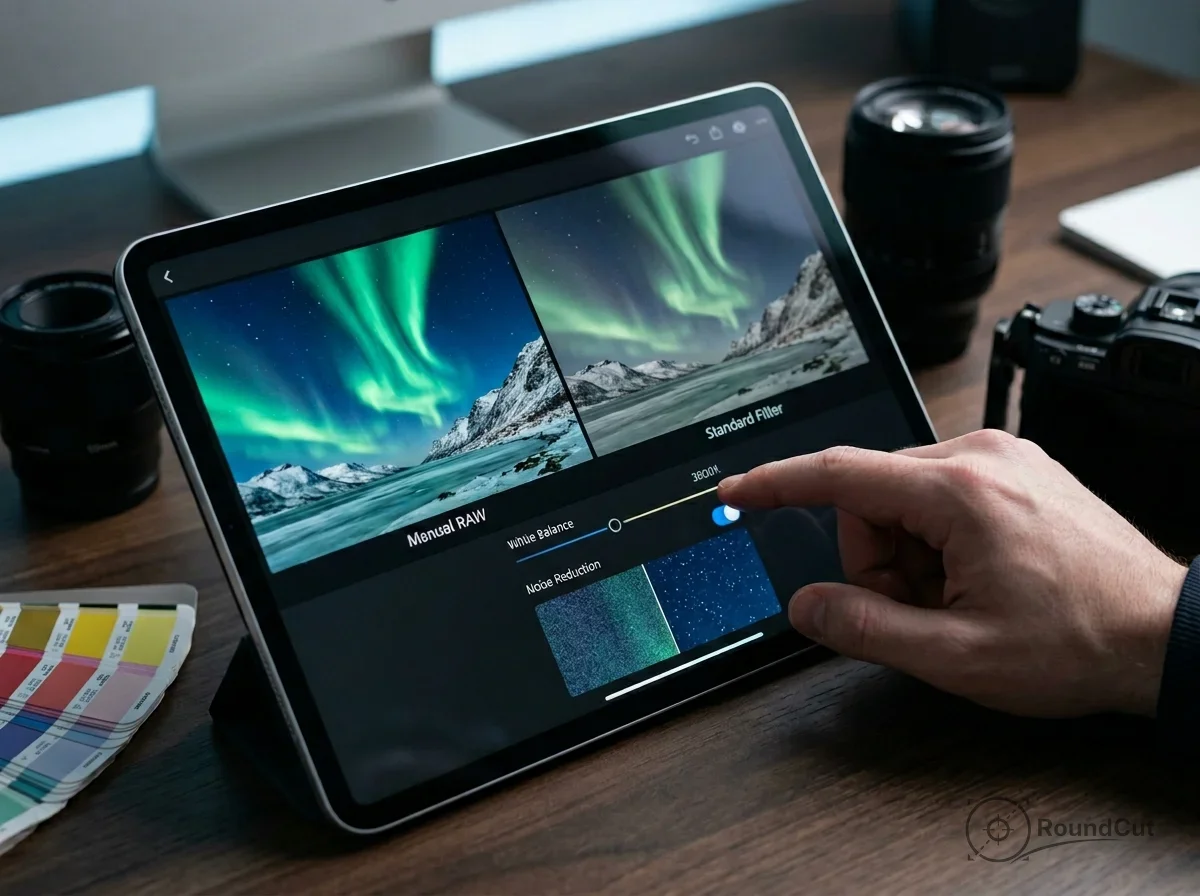
Can you edit Northern Lights photos on a mobile app?
While desktop software provides the most granular control, you can absolutely achieve great results using a best app to edit northern lights photos on your smartphone. Modern apps like Lightroom Mobile now support heavy raw files, allowing you to tweak the same data you would on a workstation. The key is to avoid those tempting “one-click” filters. Most generic landscape filters will crush the blacks in your sky, making the noise even more obvious and destroying the subtle color gradients of the aurora.
Instead of a filter, use the “Selective” tool or a Radial Mask to draw a circle over the brightest part of the display. Increase the “Dehaze” slightly within that circle to make the light appear more three-dimensional. If you find your photo looks cramped or the horizon is slightly tilted, use a free crop image utility to fix the composition. A 16:9 aspect ratio often works better for wide aurora bands than the standard 3:2 camera output, as it emphasizes the scale of the sky.
If you’re editing for a professional profile or a social media avatar, think about how that dramatic light fits into a specific shape. For example, you can create a perfect circular profile picture using the aurora as a cinematic backdrop. This works exceptionally well if you have a silhouette of yourself in the foreground, creating a striking “halo” effect around your head that instantly grabs attention in a feed. Besides, a clean crop ensures the focus stays on you and the lights, not the messy edges of the original frame.
How to optimize Northern Lights photos for Instagram without color banding?
One of the most annoying parts of editing northern lights photos for instagram is watching your smooth sky turn into a series of ugly “stairs” or blocks of color. This is called color banding. It happens because Instagram’s compression algorithm struggles with giant gradients, failing to find enough color steps to make the transition look smooth. It’s a common issue, but you can beat it with a smarter export workflow.
To prevent this, you need to be strategic. First, ensure you are working in the sRGB color space. While ProPhoto RGB has more colors, web browsers and social apps can’t display them, leading to dull, flat tones. Second, use the “Dither” option if your software provides it. Dithering adds a tiny, invisible amount of noise that breaks up the bands and tricks the eye into seeing a smooth gradient. Since large files trigger more aggressive compression, use an online image compressor to keep your file under 1MB. This allows you to maintain control over the quality rather than letting the platform’s bot mangle it. For more on optimizing images for the modern web, check out our guide on 5 essential image formats.
2026 Instagram Export Checklist:
- Long Edge: 1080px (for vertical 4:5 ratio) or 1350px.
- Color Space: sRGB (Essential for web consistency).
- Format: JPEG or WebP (if the platform allows).
- Bit Depth: 8-bit for final export, but stay in 16-bit as long as possible during the edit.
- File Size: Keep it under 1MB to avoid that nasty, automatic re-compression.
Before and After Histograms: Analyzing the Data
To really master the technical side of night photography, you must learn to read the histogram. A raw aurora photo usually has a histogram that is heavily “bunched” on the far left side. This means most of your pixels are very dark. If that peak is touching the far left edge, you’ve “clipped” your blacks, meaning there is no detail left—just pure black void. You want to avoid this while shooting, but if it happens, you’ll have to lift the “Shadows” carefully during your touch-up process.
In your processed version, the histogram should look more like a healthy mountain range in the middle. The big “hump” represents the dark sky, and the smaller peaks to the right represent the bright aurora. If you see a spike on the far right, you are clipping your highlights, which often happens with the bright green core of the light. By pulling back the “Whites” or “Highlights” sliders, you can move those pixels back into the visible range, revealing the delicate textures of those light pillars.
Think of the histogram as your objective map. If your “Before” histogram is a flat line in the shadows, your “After” goal is to stretch that line across the graph without breaking it. This stretching is what reveals the color and life in the shot. However, if you stretch it too far, you get noise. If you don’t stretch it enough, the image stays muddy. Finding this balance is the real secret to a professional night sky.
“The histogram is the only objective way to measure exposure in the field and in the digital darkroom, as your eyes and monitor can often deceive you in low-light environments. — Adobe Imaging Guidelines”
The final stage of your workflow should always be a sanity check to ensure your edits remain grounded in reality. After staring at a green aurora for an hour, your eyes naturally become desensitized, which often leads to “radioactive” levels of saturation that look amateurish. Step away from your screen for ten minutes, grab a coffee, then return to evaluate the frame with fresh eyes. Professional editors often check their northern lights photos before and after editing against a “true black” reference to ensure the sky hasn’t shifted into weird purple or blue tones. Once you are satisfied, apply that anti-banding export workflow we discussed to ensure your work looks stunning on social media. Grab your most recent raw file, open your favorite editor, and bring those dancing lights back to life by fixing your white balance and cleaning up grain with AI-denoise. You’ve got the data; now show the world what you actually saw.
If your next step is build a beautiful aesthetic instagram feed using just your phone! discover how to define your vibe, capture consistent photos, and edit uniformly with mobile apps like lightroom, Build an Aesthetic Instagram Feed: Phone Editing Guide is a dedicated option for that workflow.
FAQ
What is the best white balance for northern lights photos?
You should aim for a range between 3200K and 4500K. This ensures your greens look crisp and your dark skies remain neutral rather than turning a muddy brown or an unnatural navy.
How do I avoid color banding when posting aurora photos to Instagram?
The trick is to work in sRGB and apply dithering before you export. Also, keep your file size under 1MB using a high-quality compressor to prevent Instagram from mangling your gradients with its own heavy compression.
Can AI noise reduction ruin the texture of the aurora?
Yes, if you overdo it. Keep your AI denoise strength around 30-40% so you remove the grain without smoothing out the vertical ‘curtain’ structures that make the aurora look realistic.
Compress images without losing quality