How to Remove an Image Background for Stickers & Print (2026)
Ever had this happen? You have the perfect photo for a custom sticker. You upload it, wait for it to arrive, and… bam. The final product has a clunky white outline or jagged, pixelated edges. What looked clean on your screen is now a messy, unprofessional graphic in your hands. It’s a common problem, and it usually happens when the background isn’t removed with enough precision for printing. Trust me, it’s a small detail that makes a huge difference.
The fix is actually pretty simple. You can avoid all that frustration by using a free online tool to create a transparent cutout. Just upload your high-res photo, let the AI work its magic on the edges, and download the result as a PNG file. That’s it. This quick step ensures your design has the sharp, clean lines needed for die-cutting, without any of those ugly white borders.
Why Does Background Removal Quality Matter for Print?
So, why does the quality of your background removal matter so much for print? It’s because physical cutting machines aren’t guessing; they rely on clean digital outlines to do their job. A poor cutout with fuzzy edges translates directly into a flawed sticker or t-shirt design. While you might get away with minor imperfections on a screen, print exposes every single flaw.
Three common issues pop up from imprecise background removal:
- Jagged Edges: Automated cutters follow the path of your image’s silhouette. If that silhouette is rough from a low-quality tool, the cut will also be rough.
- The “Halo” Effect: Many tools leave a thin border of pixels from the old background, creating a white or colored “halo” around your subject. On a sticker, this looks like a sloppy, unintentional outline.
- Loss of Fine Detail: Elements like hair, fur, or intricate patterns are often the first casualties of a bad cutout. A quality removal process preserves these details, keeping the subject looking natural and sharp.
Ultimately, a clean background is the foundation for any professional-looking custom item. It makes sure the focus stays on your awesome design, not on the technical glitches surrounding it.
How Do You Prepare an Image for Sticker Printing?
Preparing a photo for sticker printing really comes down to three key steps: start with a great source file, use a precise tool for the removal, and save it in the right format. Simple as that. Following this workflow helps you dodge common printing errors and ensures your final sticker looks exactly how you pictured it. But first things first: pick a photo with decent resolution. A small, blurry image will only look worse once it’s printed.
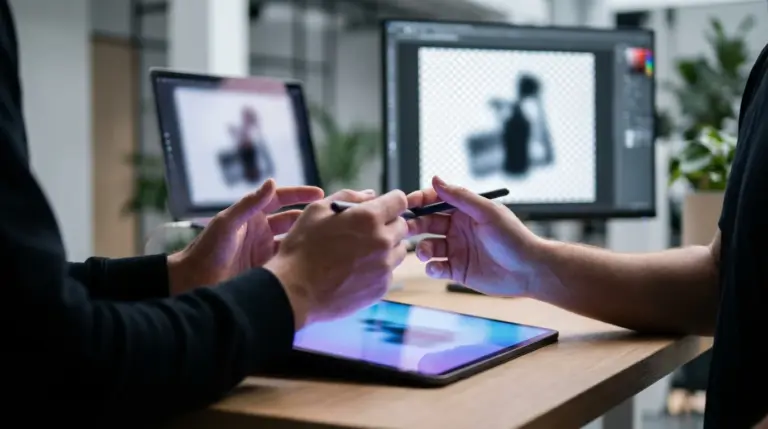
Once you have a sharp photo, use a free background remover to create a transparent version. These AI-powered solutions are pretty amazing; they identify the subject and cleanly separate it from its surroundings in just a few seconds. After you upload, you get an instant preview. I always recommend zooming in to check the edges—make sure no important details were lost, and no pesky background bits are left behind.
Then comes the final, crucial step: saving the file correctly. The only format that really works for this is PNG (Portable Network Graphics). Why? Because unlike JPEG, the PNG format supports transparency, which means the background stays truly empty instead of turning into a solid white block. If you’re curious about the nitty-gritty, you can explore the differences between PNG vs JPEG vs WebP image formats. Just remember, saving as a JPEG will undo all your hard work by slapping that white background right back on.

What Are Common Mistakes When Removing Backgrounds for Print?
I’ve seen a few common mistakes trip people up. The biggest ones are using a low-res source image, not checking the quality of the cutout, and exporting in the wrong file format. Even just one of these slip-ups can compromise your whole print job. For instance, if you start with a pixelated photo, you’re guaranteed to get a pixelated sticker, no matter how perfectly the background is removed.
Another huge error is just accepting a subpar cutout without a second glance. Some tools really struggle with complex subjects like hair or fur, leaving you with choppy lines or even removing parts of the subject itself. Always, always zoom in on the preview to inspect the details. If strands of hair are gone or the edges just look weird, the printed version will only magnify those flaws. This is especially true for die-cut stickers, since the blade follows that exact path.
A clean edge is the difference between a professional sticker and an amateur one. The cutline is generated directly from the artwork’s perimeter, so any imperfection in the image will become an imperfection in the physical product.
Forgetting to export as a PNG is another classic pitfall. We’re all so used to saving photos as JPEGs for web use, but that format’s lack of transparency support makes it a total non-starter for stickers or any print design that needs a shaped cutout. You need a transparent file, and only formats like PNG can deliver that.
What Else Can You Create with a Transparent Image?
Okay, so besides stickers, what else can you do with a transparent image? A lot, actually. Photos with transparent backgrounds are super versatile assets for all kinds of print and digital projects. They let you create smooth layers and cool compositions that are just impossible with a standard rectangular photo. Think of a clean cutout as a key ingredient in a flexible design workflow.
Imagine the possibilities:
- Custom Apparel: Print your design directly onto t-shirts, hoodies, or tote bags. A transparent background ensures that only your subject is printed, allowing the fabric’s color to show through naturally.
- Product Labels: If you sell products in jars or bottles, a transparent label can create a premium, no-label look. The design appears to be printed directly on the container.
- Marketing Materials: In brochures, flyers, and presentations, you can overlay your subject onto different colored backgrounds or graphic elements without a clunky white box around it. This is a fundamental technique detailed in many e-commerce photography style guides.
- Website Graphics: Use transparent images on your website to create dynamic layouts where text can wrap around your products or team photos.
In each case, the principle is the same. Removing the background isolates your subject, which gives you total creative control over how and where you use it.
Look, precise background removal isn’t just a boring technical step—it’s the foundation of a high-quality printed product. When you start with a sharp image, use a reliable tool for clean edges, and save in the PNG format, you’re setting yourself up for success. Your stickers, labels, and apparel will look professional and polished. So here’s a challenge: find a product photo you want to turn into a sticker right now. Process it through an online background remover and check out the print-ready result. In just a couple of minutes, you’ll have a file ready for your next big idea.
FAQ
What’s the best file format for stickers if I want a transparent background?
Definitely PNG (Portable Network Graphics). It’s the only common format that preserves transparency, which means you won’t get that annoying white box around your design when it’s printed.
How do I make sure my sticker has a clean cut line?
The cut line comes directly from your image’s outline. So, to get a clean cut, you need a high-quality cutout with sharp, well-defined edges after the background is gone. It’s as simple as that.
Do I really need Photoshop to remove a background for printing?
Not at all! You don’t need expensive software anymore. Modern AI-powered online tools can remove backgrounds automatically in seconds, giving you print-quality results for free without any downloads.
Can I use a low-resolution image for a printed sticker?
I wouldn’t recommend it. A low-resolution photo will just look blurry and pixelated when printed. For a crisp, professional-looking sticker, you should always start with the highest-resolution file you have.
Remove image backgrounds for free