How to use Imagen 2 for e-commerce product photo backgrounds
For most stores, the fastest way to get consistent catalog images in 2026 is a two-step pipeline: create a clean cutout, then use Imagen 2 for background replacement and recontextualization. This reduces reshoots, keeps lighting consistent across listings, and helps you ship web-ready files (WebP/AVIF with sensible fallbacks) that keep product pages fast.
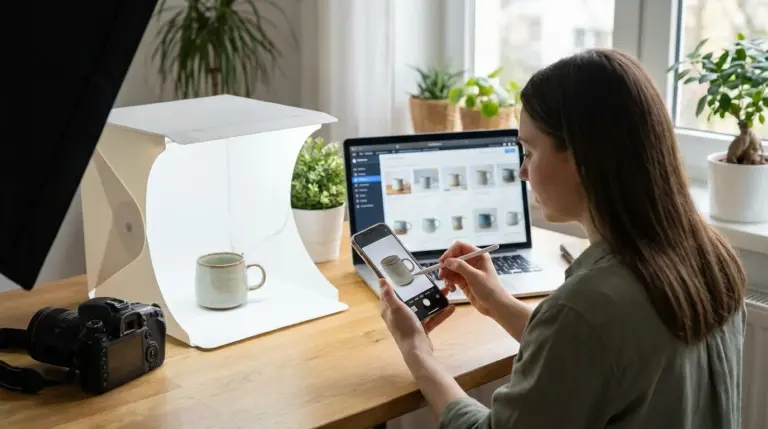
You’re staring at a product launch calendar, a half-finished photo set, and a familiar bottleneck: backgrounds. One SKU looks clean on white, another has a gray cast, and your “lifestyle” shots don’t match the lighting from one product line to the next. If you sell on Shopify and Amazon, you also have a second constraint: you can’t ship 2–6 MB images and expect fast pages or smooth scrolling.
This guide gives you a repeatable, e-commerce-first workflow for removing and replacing backgrounds with Imagen 2, plus a consistency system you can reuse across a whole catalog. You’ll also get export targets (dimensions, formats, file size ranges) so the images you generate don’t become a performance problem the moment you upload them.
What is the best background remover tool in 2026 for product photos?
The best background remover tool in 2026 is the one that matches your quality bar, your catalog volume, and your speed requirements. If you need pixel-clean edges for reflective, transparent, or hairline details, manual masking still wins. If you need scale and repeatability, an app-based cutout or an Imagen 2 edit workflow can be the better fit.
Think of it this way: “best” isn’t a brand name. It’s a decision lens that starts with what can go wrong—halos around edges, missing cutouts, color contamination, and mismatched shadows—because every one of those errors gets amplified when you reuse the cutout across dozens of scenes.
Use this table to pick a category, then commit to one workflow per product line so your output looks intentional instead of stitched together.
| Approach | Best for | Strength | Trade-off | Skip this when… |
|---|---|---|---|---|
| Manual cutout (editor masking) | Jewelry, glass, frayed fabric, plants, complex edges | Cleanest edges and highest control | Slow and operator-dependent | You need 500 SKUs processed this week |
| App-based background removal | Most standard products on simple backdrops | Fast, consistent, easy to delegate | Edges can look “processed” on tricky materials | Products are translucent, reflective, or fine-detailed |
| Imagen 2 background replacement (edit workflow) | Replacing studio backgrounds and standardizing white/neutral | Combines cutout + realistic background blending | Needs prompt discipline and QA | Your brand requires exact, audited color matching without any drift |
| Imagen 2 product recontext (API/batch) | Lifestyle variants at catalog scale | Operationalizes scene generation for many SKUs | More moving parts and compliance review | You can’t invest in a repeatable prompt and review system |
| Hybrid: cutout app + Imagen scenes | Teams that want speed without losing edge quality | Best balance for many e-commerce catalogs | Two steps to manage | You don’t have time for a two-stage pipeline |
Direct recommendation: for most stores trying to produce consistent studio and lifestyle variants, a hybrid pipeline is the most reliable: get a clean PNG cutout, then use Imagen 2 to replace backgrounds and recontext scenes in a controlled, repeatable way.
Direct disqualifier: skip AI-driven background replacement for hero images where tiny material cues sell the product—highly reflective metals, complex transparent packaging, or anything where micro-texture accuracy drives returns and customer trust. In those cases, keep the hero shot traditional and use AI scenes only for secondary images.
If you want a lightweight option for the first step, a free background remover can produce a usable cutout for many standard products. When you’re optimizing a high-volume workflow, batch processing matters too, and the cutout step becomes the place where speed either helps you or breaks your schedule. For more on scaling that stage, see the bulk background remover workflow for product photos.
How do you remove and replace a product photo background with Imagen 2?
To remove and replace a product photo background with Imagen 2, you start with a clean product image (ideally a cutout with transparency), then run an edit workflow that targets the background while preserving the product’s shape, colors, and proportions. The key is to treat this like production: fixed inputs, documented prompts, and a review checklist.
Google documents the Imagen product image editing flow for background replacement in Vertex AI, including the product-focused editing mode and the parameters you’ll set when you want consistent results across many images. Use the official reference as your source of truth: Vertex AI Imagen product image editing (background replacement). Here’s a repeatable sequence you can hand to a teammate.
- Capture for extraction: Shoot one clean angle per listing image type you need (front, 3/4, top-down). Use even, diffused light and leave margin around the product so the edges aren’t tight to the frame.
- Create a clean cutout: Export a transparent-background PNG. Inspect edges at 200–300% zoom. Fix fringing, missing holes (like mug handles), and stray pixels.
- Run background replacement: In the Imagen 2 edit workflow, upload the cutout (or the original image if your tool supports background removal internally), then describe only the background and lighting you want. Keep the product description out of the prompt so the model doesn’t re-imagine it.
- Generate multiple candidates: Produce 4–8 variations per prompt. You’re buying yourself options so you can select the one that matches your catalog’s look.
- QA for commerce, not aesthetics: Check edge blending, cast shadows, and color accuracy. Reject anything that alters logos, label text, or proportions.
Catalog QA checklist (use on every output):
- Edges: no halos, no jagged cut lines, no melted details
- Shadows: single consistent light direction, no double shadows
- Color: product color matches the known reference photo
- Brand marks: text and logos remain readable and unaltered
- Scale: product size makes sense relative to the surface and props
When you standardize this workflow, you’re also standardizing decision-making. That’s the real win for e-commerce teams: fewer debates, fewer “just one more tweak” cycles, and faster publishing.
What prompts work best for consistent e-commerce product backgrounds?
The best prompts for consistent e-commerce product backgrounds use a fixed template, controlled lighting language, and clear exclusions. Your goal isn’t artistic variety. Your goal is predictable composition that keeps the product as the hero across every SKU in a category.
In other words, you’re writing prompts the way you’d write a studio brief: surface, light direction, lens feel, background style, and what must not appear. Avoid abstract words like “premium” and focus on what the camera would see. Use this prompt template:
- Scene: the environment or backdrop
- Surface: what the product sits on
- Lighting: direction, softness, and color temperature
- Composition: product-photo framing and depth of field
- Style constraints: minimal vs prop-heavy
- Negative constraints: what must not appear or change
Negative constraints you’ll reuse often: no text, no watermark, no extra products, no hands, no distorted label, no altered logo, no changed packaging.
Below are three “before/after” workflows you can copy into your internal playbook. They’re written as prompt-and-setting recipes so you can reproduce results, not as vague inspiration. Treat them as starting points and adjust to your brand’s palette.
Example workflow 1 (studio white standardization):
Raw product photo → clean cutout → uniform white background replacement.
- Input: transparent PNG cutout, 2000 px minimum on the shortest side
- Generation count: 6 variations
- Prompt: “Pure white studio background, soft diffused light from upper left, subtle natural shadow directly beneath the product, clean catalog product photography, neutral color balance, minimal look”
- Negative constraints: “no text, no watermark, no props, no reflections added, no label changes, no logo changes”
- Accept when: edges look crisp and the shadow looks like a single softbox
Example workflow 2 (beauty flat lay lifestyle):
Raw product photo → clean cutout → countertop scene with controlled props.
- Input: 3/4 angle cutout PNG (avoid perfectly straight-on for reflective packaging)
- Generation count: 8 variations
- Prompt: “Light gray stone bathroom countertop, soft window light from the right, gentle shadow under the product, a single small green leaf blurred in the far background, minimal lifestyle product photography, shallow depth of field, neutral tones”
- Negative constraints: “no text, no watermark, no extra cosmetics, no hands, no altered label, no altered bottle shape”
- Accept when: the light direction matches the shadow and the prop stays secondary
Example workflow 3 (electronics on-brand color background):
Raw product photo → clean cutout → brand-colored gradient backdrop without color contamination.
- Input: cutout PNG with clean edges around ports and thin elements
- Generation count: 6 variations
- Prompt: “Smooth gradient background from deep navy to soft slate, cool studio lighting, subtle shadow under the product, crisp commercial product photography, clean negative space, no visible texture on the background”
- Negative constraints: “no text, no watermark, no extra devices, no cables, no altered buttons, no altered logo, no color cast on the product”
- Accept when: the product color remains neutral and the gradient looks uniform
Once you have 3–5 approved prompt recipes per category, stop improvising. Save the prompts, name them, and require that every new SKU uses an existing recipe before anyone writes a new one. That rule alone does more for catalog consistency than any single model upgrade.
If you want more guidance on keeping a catalog visually unified beyond backgrounds, the article on visual branding consistency pairs well with prompt libraries and QA checklists.
How do you generate lifestyle product scenes without changing the product?
To generate lifestyle product scenes without changing the product, you need a cutout that preserves the exact product pixels, plus a recontext workflow that treats the product as fixed and the environment as variable. Your prompt should describe the scene and lighting, not the product, and your review step should reject any subtle redesign.
At scale, product recontext becomes an operations problem: you’re generating many scenes per SKU, and you need reproducible settings so your outputs don’t drift. Google’s reference for programmatic product recontext is the place to start when you want to batch this for a catalog: Imagen product recontext API. Use this practical control system to keep the product stable across lifestyle scenes:
- Lock your source angles: pick 2–3 angles per category (front, 3/4, top-down) and don’t mix angles within one “scene set.”
- Limit props: one prop that signals context beats five props that steal attention and confuse scale.
- Control light language: use the same two lighting patterns across the catalog, like “soft window light from the right” and “diffused overhead studio light.”
- Define acceptable shadows: a soft contact shadow is usually safe; dramatic directional shadows create mismatches and look like composites.
- Reject label changes: even small text warping is a hard fail for product pages.
Here’s a concrete sequence you can execute for a Shopify store that wants three lifestyle variants per SKU without re-shooting:
- Create a transparent PNG cutout for each chosen angle.
- Pick three brand-safe scenes that match your audience (kitchen counter, work desk, gym bag, bedside table, and so on).
- For each scene, generate 6–8 candidates and shortlist 2 that pass QA.
- Pick one “hero lifestyle” per SKU and keep the other two as alternates for ads, email, or seasonal refreshes.
This is where many teams lose time: they chase variety, then spend days rejecting outputs. If you cap each scene to one prop and one lighting pattern, your acceptance rate rises, and your edits drop.
When you use AI-generated scenes for commercial imagery, treat policy and compliance as part of the workflow, not an afterthought. Google’s guidance covers usage constraints and responsible practices for Imagen outputs: Responsible AI and usage guidelines for Imagen. Bake those checks into your QA checklist so you don’t generate assets you can’t publish.
What image formats and file sizes should you use for faster product pages?
The best image formats for faster product pages are modern formats (AVIF or WebP) with a fallback for broader compatibility, exported at the smallest dimensions that still look sharp on the device sizes you serve. Your format choice only matters if you also control export dimensions, compression level, and the number of images per page.
To make the trade-offs clear, separate “visual quality” from “delivery quality.” Visual quality comes from good lighting and accurate color. Delivery quality comes from file weight, responsive sizes, and the right format for the browser. MDN’s guide is a reliable reference for choosing between AVIF, WebP, JPEG, and PNG and knowing when fallbacks matter: AVIF vs WebP vs JPEG/PNG image format guidance. Practical export targets (use as a starting point):
- Main product image: 1600–2000 px on the long edge, aim for 150–350 KB in WebP; AVIF can often go lower at similar perceived quality
- Thumbnail/grid: 600–900 px on the long edge, aim for 40–120 KB
- Zoom detail: only if your theme supports it well; 2000–3000 px long edge, aim for 300–700 KB
- Transparency needs: keep PNG only when you truly need alpha (logos, overlays); for product photos, prefer solid backgrounds so you can use WebP/AVIF
Don’t let generated images become performance debt. If you produce 10 lifestyle variants and upload them all, your page weight spikes, and conversion suffers. A tight standard helps: pick 5–7 images per product page (including variants), and export each to a predictable size range before it ever touches your CMS.
If your pipeline already produces good-looking images but your pages still feel heavy, an online image compressor can help you hit consistent file size targets before uploading. For deeper format strategy, you can also reference AVIF vs WebP in 2026 to align your exports with how modern browsers handle formats.
When a marketplace requires specific formats, keep a conversion step in your checklist. A free convert format tool is a simple way to produce a JPEG fallback for platforms that don’t accept modern formats, while keeping AVIF/WebP for your own storefront.
What quality and compliance checks keep Imagen 2 outputs safe for e-commerce?
The quality and compliance checks that keep Imagen 2 outputs safe for e-commerce focus on three things: product truthfulness, brand accuracy, and publishability. If an image changes what the customer will receive, even subtly, it doesn’t belong on a product page.
Set a clear boundary between “listing images” and “marketing images.” Listing images should be conservative: accurate color, accurate packaging, no misleading context, and no edited-on features that aren’t included. Marketing images can be more stylized, but they still need to respect platform policies and avoid misrepresentation. Use this pass/fail checklist before publishing:
- Truthfulness: no added accessories, no implied bundle, no feature changes, no altered material look
- Text integrity: label text remains readable and unchanged; reject any warping
- Logo integrity: logos remain crisp; no invented marks appear
- Context honesty: props don’t suggest included items (chargers, cables, extra parts)
- Category compliance: avoid restricted claims or sensitive content tied to your niche
Catalog teams also need a consistency check, or your store starts to look like a marketplace of unrelated sellers. Use one “gold standard” reference photo per product line and compare every generated output against it for hue and brightness drift. If you see drift, don’t fight it image by image—adjust your prompt recipe and re-generate with tighter lighting language.
When you operationalize this, add a short governance step: one person owns the approved prompt library, and one person owns final QA. That split prevents prompt sprawl and keeps your catalog stable over time. If you need a refresher on the capture fundamentals that make AI editing easier, the guide on essential product photography steps in 2026 is a solid companion to the generation workflow.
Pick one product category, build three prompt recipes, and run a pilot with 20 SKUs: clean cutout, Imagen 2 background replacement, one controlled lifestyle recontext, then export to AVIF/WebP with strict file-size targets. If your acceptance rate stays high and your pages stay fast, roll that exact playbook across the rest of your catalog.
If your next step is learn how a free transparent background maker uses ai to remove backgrounds. this guide covers the process, tips for quality cutouts, and png format, How to Use a Free Transparent Background Maker (A Simple Guide) is a dedicated option for that workflow.
FAQ
Can you use Imagen 2 images as main product listing photos?
You can, as long as the output stays truthful: no altered labels, no changed proportions, and no misleading accessories or context. Many stores keep the hero image traditional and use Imagen-generated scenes for secondary lifestyle images to reduce risk.
What’s the safest way to remove the background from product photos?
The safest approach is a clean cutout workflow with a transparent PNG and manual edge cleanup when needed. This produces predictable edges and reduces artifacts that would repeat across generated backgrounds.
How do you keep product colors consistent across AI backgrounds?
Use a fixed lighting description in your prompt recipes, compare outputs to a single reference image, and reject any color cast on the product. If drift keeps appearing, tighten the prompt and regenerate instead of correcting many files manually.
What file size should product images be for a fast Shopify store?
A practical target is roughly 150–350 KB for main images and 40–120 KB for thumbnails, using WebP or AVIF when possible. Exact targets vary by theme, image count, and zoom behavior, but consistent caps help prevent slow pages.
What should you avoid generating for e-commerce compliance?
Avoid outputs that change the product’s truth, such as altered text, invented logos, added accessories that look included, or scenes that imply features the product doesn’t have. Follow the platform’s commercial usage guidance for the image model you use.
Remove image backgrounds for free