iPhone’s Native Photos App: E-commerce Product Editing
You just finished a product photoshoot using only your iPhone and now face the task of editing dozens of images to look consistent and professional for your Shopify store. The native Photos app on your device is more than just a gallery; it’s a powerful editing suite that can handle most of your e-commerce needs without requiring third-party software. From basic adjustments to advanced color correction, you can prepare your product photos for launch directly from the device you used to capture them.
Mastering the Core Editing Tools in the Photos App
Before diving into complex adjustments, you must master the fundamental tools. When you open an image and tap ‘Edit,’ you’ll find a set of icons at the bottom. The first, a crop icon, is your starting point for framing product shots. You can straighten a slightly tilted image, adjust the vertical or horizontal perspective, and crop to a specific aspect ratio like a square for Instagram or 16:9 for a website banner. The ‘Auto’ button, represented by a magic wand, applies a balanced set of adjustments to light and color. While it provides a good baseline, you’ll often achieve better results by making manual tweaks for a custom look that matches your brand’s aesthetic.
Adjusting Light and Color for Professional Results
The core of photo editing lies in controlling light and color. In the Photos app, these settings are grouped under the dial icon. Each slider serves a specific purpose, and understanding them helps you make your products look their best.
- Exposure: This brightens or darkens the entire image. For product photos on a white background, a slight increase in exposure can help make the background pure white.
- Brilliance: A smart tool that brightens shadows and tones down highlights simultaneously, adding overall clarity and vibrancy.
- Highlights & Shadows: Use the ‘Highlights’ slider to recover detail in bright areas, like reflections on a glass bottle. The ‘Shadows’ slider lifts details out of dark areas, which is useful for showing texture in dark fabrics.
- Contrast & Brightness: Contrast adjusts the difference between light and dark tones. Increasing it makes images pop, but too much can lose detail. Brightness adjusts the mid-tones without affecting the absolute black or white points.
- Saturation & Vibrance: Saturation uniformly boosts all colors, which can sometimes look unnatural. Vibrance is more subtle, as it intelligently enhances muted colors while leaving already saturated tones, like skin tones, untouched.
For example, when editing a photo of a wooden piece of furniture for your online store, you might increase warmth to enhance the natural wood grain, lift the shadows slightly to show detail, and add a touch of vibrance to make the colors richer without oversaturating.

Using Filters and Batch Editing for Consistency
Consistency is vital for a professional-looking e-commerce catalog. The Photos app helps you achieve this efficiently. While it offers built-in filters like ‘Vivid’ or ‘Dramatic,’ their real power for business use comes from the ability to copy and paste edits. After you’ve perfected the look of one product photo—adjusting the exposure, color balance, and sharpness—you don’t need to repeat the process for every other photo from the same session.
Simply tap the three dots (…) in the top-right corner of the edited image and select ‘Copy Edits.’ Then, navigate to another photo, tap the same three dots, and choose ‘Paste Edits.’ You can even select multiple photos in your library and paste the edits to all of them at once. This technique ensures that all product images on a category page have a uniform look, creating a cohesive and trustworthy brand experience for your customers.
Applying Advanced Photo Refinements
Beyond the primary adjustments, the Photos app contains several tools for fine-tuning your images. These are especially useful for highlighting specific product features.
Sharpening and Defining Details
The ‘Sharpness’ and ‘Definition’ sliders work together to enhance clarity. Sharpness affects the edges of objects, making them crisper. Definition adds clarity to the entire image, improving mid-tone contrast. For a photo of a textured handbag, a small increase in both can make the material details stand out. ‘Noise Reduction’ is useful for photos taken in lower light, smoothing out grainy artifacts that can appear.
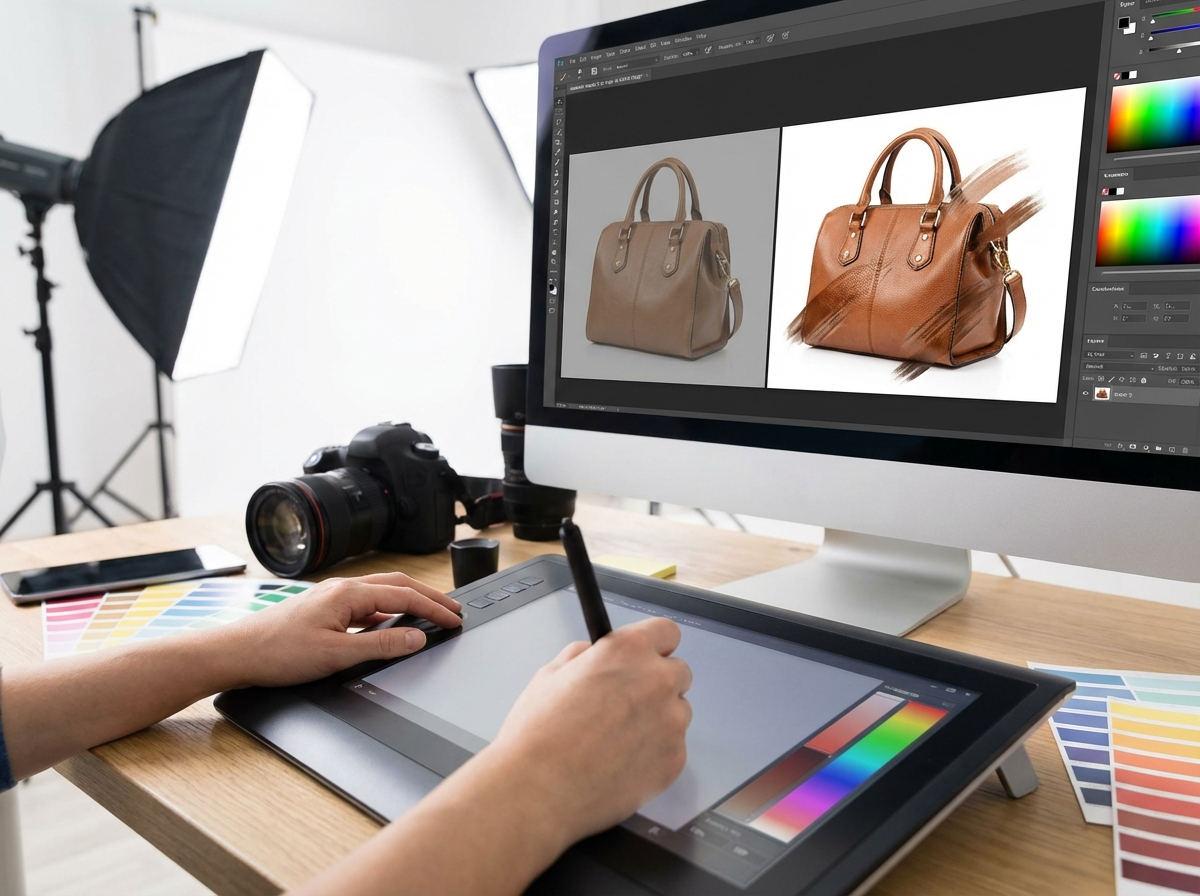
Lifting Subjects from Backgrounds
A newer feature in iOS allows you to lift a subject directly from its background. Simply tap and hold on the main object in your photo, and your iPhone will automatically trace its outline. You can then copy this cutout and paste it into another application. While this is great for quick social media posts, product listings on e-commerce platforms or your own website often require a perfectly clean, white background. For those cases, an online tool designed specifically for this task, like a free background remover, can provide more precise and professional results.
Editing Videos for Product Demos and Social Media
The same powerful editing tools available for photos also apply to videos. After recording a product demonstration or a short promotional clip, you can open it in the Photos app to make key adjustments. You can trim the beginning and end of the clip to remove any unwanted footage, crop the frame to fit different social media formats, and straighten the horizon line.
The full suite of color and light adjustment sliders—Exposure, Contrast, Saturation, and more—is available for video. This allows you to color-grade your video clips to match the aesthetic of your photo catalog. If you recorded a video in Cinematic mode, you can even adjust the focus point after the fact, shifting the viewer’s attention from one product feature to another smoothly. You can also mute the original audio if you plan to add background music later in an app like Instagram Reels.
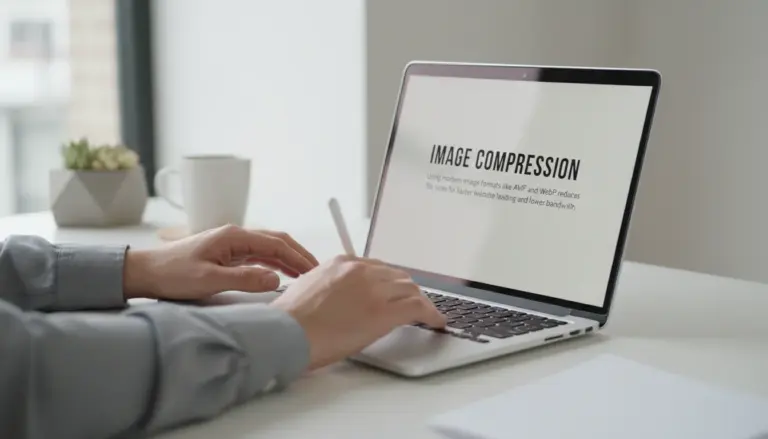
Optimizing Edited Files for Web Performance
Once your photos and videos are edited, the final step is ensuring they are optimized for your e-commerce platform. High-resolution images from your iPhone look great but can result in large file sizes, which slow down your website’s loading speed. Slow loading times can negatively impact user experience and even hurt your search engine rankings. Before uploading your beautifully edited product shots to your store, reduce their file size.
This doesn’t mean you have to sacrifice quality. An online image compressor can reduce the file size by 50% or more with virtually no visible loss in quality. This simple action ensures your product pages load quickly for all customers, whether they are on a desktop computer or a mobile device with a slower connection. A fast, responsive website is a key component of a successful online store.
Your iPhone is a complete mobile studio for capturing and refining your e-commerce visuals. The built-in Photos app offers all the essential tools to create clean, consistent, and professional-looking product content. Take a photo you’ve recently shot for your store and apply the light and color adjustments discussed. You’ll see how a few simple tweaks can transform a standard snapshot into a compelling product image ready for your customers.
Remove image backgrounds for free